How to Make a Drawstring Bag?
If you like keeping things neat and organized, you appreciate the art of packing within your packing. This skill comes in handy when you want things the items you have kept away in your drawers, closet and bags to remain organized. Things lie packing cubes, dividers and drawstring bags come in handy for this.
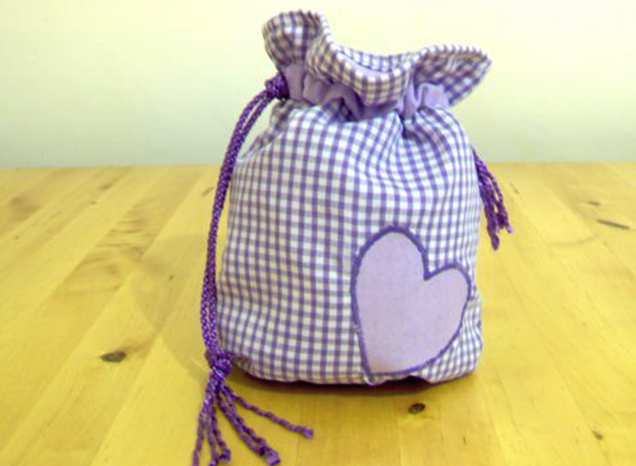
In this piece, we shall go through the process of making a drawstring bag. Why purchase one if you can make it yourself, right?
But before we start, we should point out that these are not only great for packing but also excellent as gifts. And depending on the size you make, they can accentuate your fashion and make it easier to carry heavy luggage. You are free to make drawstrings of any sizes, but this tutorial guides you in making a drawstring bag measuring 8 ¾” x 11 1/4 “.
What you need
- 1/3 yard of beautiful fabric
- Cotton cording
- Ribbon for strings
- Twill tape
Step 1
Cut the fabric into two pieces. Each piece should measure 10” x 13” (using these measurements, you will have leftover fabric).
Step 2
Turn the 10” side edge under by a ¼ inch and then stitch it down. Do the same thing with the other rectangular piece.
Step 3
After folding, you should lay the two pieces s’ seam side by side. Ensure the right sides are touching each other and then stitch time together using a 5/8 allowance. Stitch three sides and leave the top open. Speaking of the top, as you should stop stitching two inches below the edge (top).
Step 4
On the side of the seam, press the allowance flat with a dry iron and then turn the raw edge under the seam. Stitch this into place all around the opening.
Step 5
Turn every side 7/8 inches down and then stitch the bottom edge of the drawstring bag. This will create a casing.
Step 6
Cut your ties into 18: long pieces (two). Then thread the pieces through one of the casing. Go through the drawstring gaps and then back through the second casing with a safety pin. Once it goes through, tie the ends together.
Starting on the opposite side of the bag, you should repeat this process. When you are done, you should have two handles, which, when you pull the bag, closes.
And with that, you can pat yourself on the back for finishing the project successfully. You should also look for something to carry in the bag.
Also, we should point out that though this guide is simple, you can use pretty much any fabric colour and pattern you please. However, the type of fabric you will choose will be dictated by the weight of the items the drawstring carry and if it is intended to be a fashion statement or not.
Once you understand the process, feel free add some creativity to your creation. And for extra fun, you can finish the project with your little one.


