
How to Choose the Best Patio Louvered Pergola?

A Patio Louvered Pergola can turn a bright, exposed patio into a flexible outdoor room. Its adjustable louvers let you manage sunlight and airflow, but the right choice depends on your space, climate, and daily habits. Measure the patio carefully. Notice where afternoon sun lands, where rainwater flows, and whether nearby doors need clear access. Small details matter.

Before comparing models, consider the frame material, louver operation, drainage design, and installation requirements. A sturdy frame should feel stable, while the louvers should move smoothly without awkward effort. Ask how water exits the system during heavy rain. Check warranties and maintenance guidance, too. A polished finish is not proof of lasting performance.

Expert insight can help, but a named quotation should be verified against a reliable source. No source article or expert quotation was provided here, so I won’t invent one. That gap is worth addressing before publication. The guide can still help you compare options, spot practical trade-offs, and choose a pergola that fits your patio rather than merely looking impressive in a product photo.
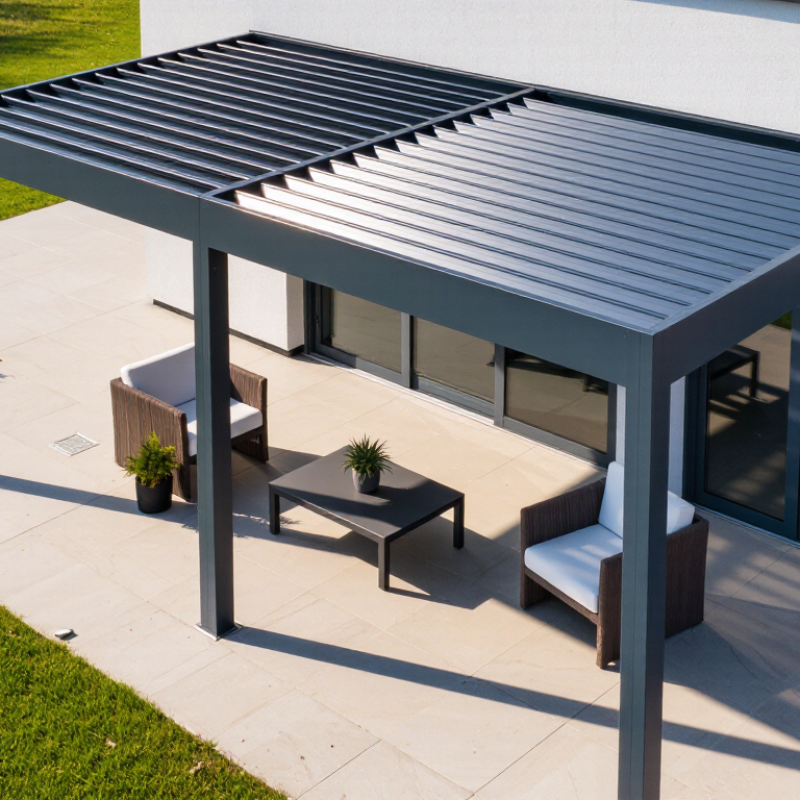
How to Choose the Best Patio Louvered Pergola?

Assess Your Patio Space, Climate, and Intended Use

How to Choose the Best Patio Louvered Pergola?

Assess Your Patio Space, Climate, and Intended Use

Start with careful measurements, not a guess from the doorway. Note the patio’s width, length, and nearby doors, windows, drains, and overhead branches. Leave enough room to pull out chairs and walk around a dining table. Check the ground, too: uneven paving or poor drainage can complicate installation. A quick sketch with furniture marked in place often reveals awkward corners before they become expensive surprises.

Tips: Track sun and weather for several days. Where does afternoon glare land? Does wind funnel between nearby walls? In rainy climates, consider how adjustable louvers will direct water and whether runoff could reach a doorway. For exposed or unusually windy sites, ask a qualified installer about suitable anchoring and local requirements. Small details matter.

Think about how you will use the space most often. A shaded reading spot needs different furniture clearance than an outdoor dining area or a place for children to play. Louvers can help you adjust light and airflow, but they do not make every patio comfortable in every season. Measure again after choosing furniture; people often underestimate how much room chairs need. Plans can change, and that is fine. A layout that works on paper may feel cramped once people gather, so leave a little breathing room.

Compare Louver Materials, Adjustability, and Operating Systems

When comparing louver materials, look beyond appearance. Aluminum resists rot and keeps blades relatively light, but coating quality and coastal exposure matter. The Aluminum Association’s Aluminum Design Manual gives aluminum an elastic modulus of about 10,000 ksi; the American Institute of Steel Construction lists about 29,000 ksi for steel. These figures describe stiffness, not overall strength. Blade shape and thickness still determine how much a louver flexes. The USDA Forest Products Laboratory’s Wood Handbook also notes that wood changes dimension with moisture, so timber louvers need regular finish checks. A small maintenance detail, easily overlooked.

Adjustability matters as much as material. Louvers that tilt smoothly let you redirect low afternoon sun, release trapped heat, or close against light rain. Ask to operate a sample: does the crank feel steady, and do the blades meet evenly? Manual systems are simple and avoid dependence on power. Motorized systems are convenient for frequent adjustments, but check access to the motor, wiring, and controls before installation. Rain and wind sensors can automate movement, yet they do not replace proper drainage or site-specific structural design. Consider where water runs when blades close. A showroom demonstration may not reveal that.

Choose the Right Pergola Size and Installation Method

Choose the pergola footprint around how people actually move. Measure the table with chairs pulled out, then leave a clear route to the door. A 3-by-3-metre dining area may feel cramped once chairs and a serving path are added. Mark the proposed posts with tape before ordering. It is a small test, but often reveals a poor fit. The U.S. Access Board recommends 36 inches as a minimum clear walking width for accessible routes; use it as a practical reference, not a universal local requirement. NOAA’s 1991–2020 U.S. Climate Normals can help you assess local rainfall and temperature patterns when planning shade and drainage.

Installation deserves equal attention. A wall-mounted frame can reduce the number of posts, but only when the wall and its connections can carry the loads. A freestanding pergola offers more placement flexibility; its footings still need suitable soil and secure anchoring. ASCE/SEI 7-22 provides location-specific wind design data using three-second gust speeds, with values affected by site conditions and risk category. Ask an experienced installer or structural professional to check those local loads before fixing the base. This step is easy to underestimate. Also confirm how the louvers open, where rainwater drains, and whether nearby doors or branches interfere. Plans can miss those details. Recheck them on site.

How to Choose the Best Patio Louvered Pergola? - Choose the Right Pergola Size and Installation Method

Planning Factor Typical Option or Range Best Suited For Installation Considerations Checks Before Choosing
Compact pergola About 10 × 10 ft (3.0 × 3.0 m) A small seating area, bistro set, or compact patio. Confirm that posts will not obstruct doors, steps, or walkways. Allow space for post bases and any required drainage. Measure the usable patio area and check the product’s outside dimensions, including posts and gutters.
Medium pergola About 10 × 12 ft (3.0 × 3.7 m) or 12 × 12 ft (3.7 × 3.7 m) A dining table or a combination of seating and circulation space. Plan the furniture layout before placing the posts. Keep enough clearance for chairs to move and people to pass. Check the louver operation area and whether the open roof position provides the desired sunlight and ventilation.
Large pergola About 12 × 16 ft (3.7 × 4.9 m) or larger Large dining areas, outdoor entertaining, or multiple furniture zones. Larger spans may need additional supports or a specific structural layout. Follow the manufacturer’s approved configuration. Verify structural requirements, site access for delivery, local permits, and applicable wind and snow-load requirements.
Anchoring to a concrete slab Post bases fastened to suitable structural concrete Existing patios with sound, adequately thick concrete. Confirm slab thickness, condition, reinforcement, and edge distances before drilling. A thin or damaged patio surface may not be suitable. Use the specified anchors and installation details. Check for buried utilities and confirm that water drains away from the structure.
Anchoring to footings Posts secured to concrete footings below grade Soil, lawn, or locations where an existing slab cannot provide suitable anchorage. Footing dimensions and depth depend on soil, frost conditions, local codes, and the pergola’s design loads. Check local permit requirements and underground utilities. Use site-specific footing specifications rather than assuming one size fits all.
Mounting on a deck Posts connected to the deck’s structural framing Raised decks that have been verified to support the pergola and expected loads. Deck boards alone are generally not a structural anchoring point. Posts may need to connect directly to joists, beams, or reinforced framing. Have the deck structure assessed where necessary, especially for wind uplift and lateral loads. Check railing, roof, and door clearances.
Wall-attached installation One side supported by a suitable building wall; other posts supported independently Patios beside a house where a wall-mounted layout is permitted and practical. Attachment must connect to appropriate structural framing, not just siding or trim. Provide suitable flashing and water management. Confirm wall construction, attachment details, warranty conditions, and local code requirements before installation.
Freestanding installation All pergola posts independently anchored Open patios or locations set away from the house. Requires a suitable foundation and adequate anchorage at every post. Position the structure to preserve access and drainage. Check site exposure, overhead obstructions, property boundaries, and required clearances before finalizing the layout.
Roof drainage and operation Drainage route and louver mechanism vary by model Every installation, particularly where rainwater could reach doors, foundations, or neighboring areas. Identify where water exits the pergola and whether downspouts or drainage connections are needed. Keep moving parts clear of branches and other obstacles. Review the product’s operating instructions, drainage details, maintenance needs, and local requirements for directing rainwater.

Planning note: The dimensions above are common layout examples, not universal standards. Final sizing, anchoring, permits, and structural requirements depend on the selected pergola, site conditions, and local building codes.

Evaluate Weather Protection, Drainage, and Long-Term Durability

How to Choose the Best Patio Louvered Pergola?

A good louvered pergola should handle changing weather, not just look attractive on a sunny day. Check how far the louvers tilt and whether they close tightly enough to limit wind-driven rain. Shade patterns matter, too: narrow gaps can still let strong afternoon sun reach a dining table. If possible, inspect a full-size display and operate the louvers yourself. The movement should feel steady, not strained.

Drainage deserves close attention. When louvers close, water should run toward gutters or channels and discharge away from seating areas and the house foundation. Ask where the outlet sits, then picture a heavy shower falling beside your patio door. For durability, examine frame joints, fasteners, and the finish for signs of corrosion resistance. Materials and maintenance needs vary by climate. A detail I might overlook at first is access for cleaning leaves from the channels.

Tips: Request the written wind and water performance ratings, and confirm the conditions they cover. Check whether the installation surface can support the structure. Clear drainage paths seasonally, especially after storms. A pergola can still leak in unusually strong, angled rain; that is worth accepting before purchase, not discovering during dinner.

Compare Total Costs, Warranties, and Maintenance Requirements

When comparing patio louvered pergolas, look beyond the advertised price. Include delivery, installation, electrical work for motorized louvers, and any required footing or drainage changes. The Remodeling magazine 2024 Cost vs. Value Report puts the average U.S. wood deck addition at $17,615, with an estimated $14,596 in resale value. That is a useful outdoor-project benchmark, not a pergola quote. Local labor and site conditions can change the total sharply.

Read warranties line by line. Separate coverage for the frame, finish, louvers, and motor; check the term, exclusions, and whether labor is included. A long frame warranty may offer little help if fading or moving parts are excluded. Ask what happens when a part needs replacing years later. Get the answer in writing. Small detail, big difference.

Maintenance deserves a real estimate, too. Ask how often the finish needs inspection, whether moving joints require cleaning, and how to clear leaves from the gutter or drainage channel. Coastal air, tree sap, and standing water can add work. I would compare the same maintenance tasks across shortlisted models; otherwise, the “low-maintenance” label is hard to test. And frankly, homeowners may underestimate the time spent clearing debris after windy weeks.

How to Choose the Best Patio Louvered Pergola?

Compare estimated 10-year ownership costs, warranty coverage, and maintenance needs.

How to read this chart: These are illustrative planning scenarios for a 200-square-foot installation, not market averages or supplier quotes. Estimated 10-year cost equals the assumed installed price plus ten years of estimated routine upkeep.

  • Manual aluminum: $12,000 installed + $200 per year for upkeep = $14,000.
  • Motorized aluminum: $18,000 installed + $350 per year for upkeep = $21,500.
  • Higher-spec motorized aluminum: $26,000 installed + $500 per year for upkeep = $31,000.

Compare warranties carefully: Check the stated term and exclusions separately for the frame, finish, louvers, motor, and controls. Confirm whether labor, corrosion, wind damage, and replacement parts are covered. Routine care commonly includes cleaning the louvers and gutters, checking drainage, and inspecting moving parts; follow the product’s maintenance instructions.

Call Now Button